Thursday, January 19, 2017

I'M BACK

OK it's only been what 4 years???  Too much has happened to chronicle here but I am fine, aging nicely LOL.  The biggest news is that I now have 3 great grandchildren, 2 of whom are in my life and are joys to behold and to be around...

I have been a crocheting fool for quite a while now and thought a good way to get back into my blog would be to post pics of just some of the gifts I made for Christmas. The sharks were for Mikey and Nate the 2 great grandchildren who are here and the cowls were for all the women of our family. Enjoy.

The cat is Oliver. I lost my beloved Maggie almost a year ago. She was 21 years old. Anyone know anyone who wants a cat LOL.


I have a couple of other crochet items to share below.
The star blanket is a gift for a newborn (not for Oliver) and below is a birthday gift blanket for Nate's Mom.


and finally, I made myself some mittens!!!


Monday, December 9, 2013

Five Months Later

No, it didn't take me this long to move and settle in. I moved in at the end of July and immediately left for LA to be with my brother.  He fought the good fight but in the end the cancer won, and he passed on Sept. 16. I have had a much harder time dealing with his death than I thought I would, because we all knew it was inevitable, but I miss him daily and just wish I could hear his laugh one more time or his "Hey Sis, what's up?"

I have 2 photos of my brother and I to share here; the first was taken in April 2013 when he took a solitary road trip from CA to MA (he was already on hospice). This was  taken when he stopped in St. Louis to see me.  The second one was taken in August in CA shortly before he died and yes, I am sitting on my big brother's lap. I love both photos sooooo much!!!


I love and miss you One Bad Rev.  You are always in my heart .

Thursday, July 18, 2013

Two for Stamping Queens and a Break

Here are two cards I made for Stamping Queen swaps this month. On this first one, I used Heartfelt Creations stamps and a matching Spellbinders die set. To color the flowers, I used every watercolor medium I own... LOL... trying to figure out which I liked best. I believe I finally chose Intense pencils with some Neocolor II crayons. The background is a Technique Junkies technique.  Why I tried it I'll never know! I can't even color in the lines, how did I ever think I could color on the embossed areas only... eeeesh!!!  Anyway, I think the overall effect turned out pretty good. I especially love the yellow Stickles in the middle of the flowers... here it is

My next card was great fun creating. The swap was a whimsical owl and I think Paper Smooches gave me just what I needed. I am NOT a whimsical stamper but when I saw those stamps of silly animals and their sentiments, I just couldn't resist... my owl is colored with Twinks (amazing how those little jars can be sitting there for years and I just add water and voila brilliant color!) anyway the background is a chicken wire stamp from Darcie that I chose to color just a bit with my distress markers. A ribbon finished it off... 
 Ok, that's it for me for a while.  I have decided to move to a senior housing complex (it's a money thing), so I have to pack up everything (I can't stand the thought) and move at the end of the month. I will only be creating fatigue until that torture is over.  CYA soon...

Saturday, July 6, 2013

Decided to Enter...

I decided to add my USA piece to Simon Says Stamp Challenge blog's patriotic challenge. You can find other glorious entries (or enter your own art) here and if you do enter, Good Luck...

Thursday, July 4, 2013

HAPPY BIRTHDAY USA

I made this door decoration after being inspired by the Cut At Home blog check out their banner. I used tags, downloaded holiday papers, die cut letters and various embellishments. The photo isn't the best but I like how it looks hanging on my front door.


Have a safe and happy 4th of July everyone!!!

Tuesday, June 11, 2013

Stamping Queens Sketch Card

Just wanted to post my latest creation a card for a swap at Stamping Queens.  I used the Faux Silk Designer Paper technique, from the latest TJ newsletter, for the floral background piece. I like how it turned out.  I also got this beautiful paper (the shimmery mauve pieces) at Michael's for 50% off and there are a ton of sheets in great colors!! You might want to check it out.  The sentiment is from Stamping Up and I honestly  have no idea where the gal stamp came from but I thought those two stamps worked perfectly together. Hope you like it.


Thursday, May 30, 2013

Lunagirl Images

Well, I took quite a hiatus from anything creative.  I stopped working a few weeks ago and have done nothing much since then... LOL... I realized that's all I will ever do if I don't get off my duff and create something.  So, here is my first effort after my brief vacation thanks to my online friend Michele who blogs at Art From the Well .  She is a design team member at Lunagirl Images an online shop with wonderful retro images to download, and she happened to mention a Diva challenge on their blog and I decided to join in.  Thanks Michele for getting my mojo working!!!  Here is my entry.  Not only is the image of the diva (crowned in gold stickles that you really can't tell are sparkly from the image) from Lunagirl but the background paper is one of their collage sheets as is the title "The Gem" which she is don't you think... so without further ado...

Now I need put in the link on their blog.  Go check them out, I think you'll like their images.-*
"

Sunday, April 21, 2013

Another Alpha Stamps Swap

I just love Alpha Stamps products for creating/altering anything.  If you have never checked them out, go take a look HERE.  They have an awesome monthly kit and their swaps are such fun!!!  Here are my 3 swaps for their Spring Fling 4 x 4 swap.  I used coasters as the base to which I added background paper and then images from Alpha Stamps collage sheets (it's hard to pick just 1 or 3 because the images are so beautiful). I then added embellishments and sent them off.  The photos I took looked good at the time but on the computer they are dreadfully washed out but here they are:


Thanks for stopping by...

Sunday, April 14, 2013

Hi, Just wanted to post my latest card.  Technique Junkies is once again doing their "technique of the week" and this past week the technique is one called Bands of Color. There were lots of really pretty cards posted, here's mine:
Once made, I sent this out to my Stamping Queen swap partner.  I hope she likes it!

Friday, April 5, 2013

Love, Life, Wisdom - My Keys

Finally, I am taking a minute to post.  I am getting backed up with things I want to share, from jewelry (yep I made another necklace) to cards, to keys and even a baby blanket.  Woohoo... Today is reserved for my precious keys.  Have you ever worked on something to the point where you think of it as your "baby"? That's what happened with my keys.  By the time it was time to send them out, I had a hard time, but I know they will go to homes that will appreciate them.  I am not going to go through the whole process of each one, suffice it to say they took a while (though totally worth the effort) and I loved each one more as I progressed with it, oh and I worked simultaneously on each one... start one, leave it for the next key, come back to the first one, etc.  All the display cards were done after the keys were completed, and those were done, each one, from start to finish.  I hope you like them...  This first key is LOVE:
This next key is LIFE:

And the third key is WISDOM:
And there you have my babies!!!  I hope you enjoyed looking at them and I wish you each could see them in  real life. Thanks for visiting...

Friday, March 15, 2013

More Cards...

I signed up for a couple of swaps with Stamping Queens for March and here are my cards... (I still have one more item to make; it's anything but a card...hmmmm) Anyway, the first card is for the card of the month (COTM).  I used distress stain on printed tissue paper (both Tim Holtz) and covered cardstock with it.  I happened to have a variety of flowers made from various products in different stages of being finished, all on my work desk (just how I usually work LOL) So, I used distress stains for my grunge paper flower (ripe persimmon and tarnished brass) and colorwash jewels spray in Citron from stampzia on my kraft paper flower and for my crinoline flower (tucked underneath) I colored it with neocolor II crayon and washed it with water, then added a champagne mist over it.  I like how it turned out and hope Vanessa, who is receiving it, likes it too!


My next card was for a vintage card swap and I guess I interpreted vintage as old and tore up (kind of like me LOL) Anyway, here it is:
 
I embossed coordination cardstock then sanded it and lightly added in some distress ink.  I distressed the edges greatly, made the tulle flower (can you tell I am still on my flower-making kick, ah maybe y'all didn't ever know I was cuz mostly I just have them lying around not being used on anything LOL... anyway, I used a dark gold/tarnished something colored tulle and then added vintage photo on the edges somewhat.  The stamp is a clear stamp from Glitzit.  I put it all together and Voila, "Memoirs".  

Have a wonderful weekend and stay tuned for my "anything but a card" thingie I am making and also, I am right now altering keys for a swap in another group I belong to.  I am loving how they are turning out and can't wait to share them with you.  Thanks for stopping by!!!
 

Monday, March 4, 2013

SHOCK!!! I made a piece of Jewelry

My usual pattern is to either play with papercrafts OR play with beads and wire; not both at the same time though... until now.  It was my daughter's 42nd birthday (and she's my baby, egad time flies) anyway, I always make my own cards, not a problem but I wanted to surprise her with a piece of jewelry because she knows I haven't been making any for quite some time. 

There are 2 blogs I follow because the gals are so darn creative in soooo many areas.  Now I love altered art but  Bev at Flamingo Toes  takes it to a whole new level.  Check out her altered dresser, it's awesome!!! Well, she and her blogosphere friend, Michele, at the Scrap Shoppe decided to do a "Jewelry Week" where for each of 5 days each one had a jewelry tutorial to share and honestly it was so much fun to follow them, especially when on the first day Michele had an incredible necklace that I really wanted to make (if only I was in my playing with beads phase, LOL).  Well, not too long after that I realized Drea's birthday was fast approaching... I had to give that necklace a try... here is the result.  Drea loved it and Michele, I hope I did you proud...


But, hey I loved how her birthday card turned out as well.  It started with my playing with Fantasy Film (y'all remember that right?) I loved how the butterfly turned out (even though I burned it just a bit... LOL)  I ended up building the card around that butterfly using a background technique video I found on Gina K's blog  (this link will take you directly to the video).  In my photos, I was trying to capture the sparkle of the butterfly (not an easy thing), so here are a couple of pics:


Whew long post today... thanks for taking the time to stop by!

Monday, February 18, 2013

Busy, Busy, Busy!!!

Yep.  I wanted to obligate myself to swaps so I would have to create pretty regularly and surprise that's just what happened... LOL...  three of the four cards I'm posting today were made in Feb. and all use techniques from Technique Junkies.  So here we go...

Card #1 was made for a swapping buddy and was simply a RAK.  It uses the banner technique from TJ (a great way to use up scraps) The papers are all scraps from K & Company:
 
Here's card #2, made as a "card of the month" for Stamping Queens uses the block fill technique and it was great fun.  The main stamp is from I Brake for Stamps colored with watercolor pencils and the sentiment is from Inkadinkado
Card #3 was also made for Stamping Queens.  The swap theme was card parts and scraps.  Hey I'm thrilled to participate in anything that forces me to use even a fraction of my scraps and again the technique is from TJ and like cards 1 and 2, this one is also from the latest TJ newsletter.  Lots of great techniques in these newsletters.  Card 3 was a bit hard to create, as my fingers are not as nimble as they used to be, so it was pretty funny to watch me try to make these paper rolls.  I do love how it turned out though, and more scraps got used... Yippee.  Here it is:
The sentiment is a clear stamp from Fiskar's stamped on a Spellbinder die cut. The ribbon is from Stamping Up.
 
Ok, so I'm tired and it's just about time for Biggest Loser so I will have to save card #4 for tomorrow.  I'm still creating also, working on 3 ATCs for a swap at Alpha Stamps. So more to come.  Thanks for stopping by...

Monday, January 28, 2013

Hi, My latest card is for a swap on Stamping Queens using either scraps or card parts... I chose scraps to create this card. I included 2 photos because it is for someone whose email is akindajoy@ and so I thought I would include it on the card.  Oh, and the ribbon is seam binding that I dyed with distress stain. It wasn't done deliberately but I love how the ribbon color matches the scraps I used.  Thanks for looking...


Sunday, January 13, 2013

THANK YOU TERRY!!!! 
This post would not have happened (and probably any future posts) if it weren't for you. I was utterly frustrated until you helped me.
 
Now on to the entry I was trying to post.  I'm kind of exhausted after the problems I've had, but the only resolution I made for 2013 was to begin an art journal and below are 2 photos of my first page. I have spent a lot of time learning by following incredible artists who journal regularly (I love Julie Fei Fan Balzer). I also spent a lot of time being scared; afraid to put anything down on a page and finally, I got brave and really heard that I need to be free to just play with my supplies and the page, with no concern for the final product and here is what transpired.  I actually surprised myself...
 
 
and it felt really good. And now, thanks to Terry, I can share my accomplishment...

Saturday, December 29, 2012

WOW 2 posts in less than a week!!!

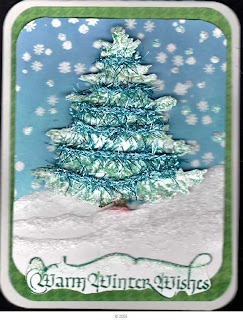
Yep here I am chronicling my playtime once again.  I got a chance to play with some of the techniques from the latest Technique Junkies newsletter.  Because I only sent out 1, count 'em, 1 Christmas card, I decided to create "winter" cards.  The first technique I tried was the online extra called Nip and Tuck.  I love the technique but had some trouble creating it (as you can see in the photo) but I really love the design of the card. 

 
Boy, the colors look really washed out but irl it is very sparkly.  For the sentiment, I used Rangers sticky embossing powder and glitter and the buttons are also sparkly.
 
My next card uses the Inked Shadows technique.  I love this technique!!!  Though you can't tell in the photo, the snowflakes are actually the negative images of dies I arranged and then cut out of my card front.  I really love how it turned out.
Ok, because this is my family's week before Christmas, I have some homemade presents to complete.  I have been a sewing fool!!!
 
HAPPY NEW YEAR EVERYONE!!!

Thursday, December 27, 2012

Fast Trip from Halloween Through Christmas!!!

It's not that I haven't been creating, more like I haven't been posting.  Aha, but wait til you see what I've been up to.  I joined a swap and for the first time on this group, Character Constructions, and it definitely was a challenge.  It was a holiday doll swap.  We made paperdolls to swap with one another.  Mine is made from paper except for the hair, lace and ribbon and honestly, it was soooo out of my comfort zone having never done anything like this before...but... I LOVED MAKING HER!!!  And without further ado here is my sweet holiday paperdoll and no, I didn't name her because she really wasn't mine and I thought the person who would adopt her should name her...


So, before I began I hunted Dollar Tree for items I thought would work in making her.  LOL... I did not use one thing I bought.  Instead, I used this blond doll hair I have been hanging on to literally for years (I can no longer even remember why I had it).  The lace (her capes and another kind on her collar and cuffs) were things I had in my craft room and her top and skirt are papers I have had for years!!!  The newest thing on her was the Tim Holtz tinsel and the kraft cardstock LOL...  So now, I am sure in 5 years I will be wondering why the heck I ever bought white rose petals, kid's white opera gloves, and a silly little green tutu... rofl, but hold on to them I will.  Anyone need some blond doll hair???  I still have enough to create a runway of paperdolls.
 
Ok, so I have been following this you tube channel.  This woman is insanely creative or perhaps just insane (LOL) she creates constantly, in all kinds of categories from crafts to crochet to recipes and who knows what else, but I just love watching her videos that catch my eye and one in particular just had to be tried.  Here is my personally made snow globe using a clear plastic cup rofl sounds silly huh?  Oh by the way, I did use something I bought at Dollar Tree, the garland around the base of the snow globe...  so, here is the cute little centerpiece I made for my daughter's dining room table.
 

Is that not just too darn cute????  Check out Hectanooga1   Be prepared if you subscribe to her channel you could get as many as 3 or more videos in a day, LOL.  She is certainly very prolific and extremely creative!!!  I also love her "papier mache" crafts and plan on trying them soon!!!! 

And finally, I wish you all joy, creativity and above all peace for the next year and all those to follow... 

Thanks for visiting!!!  I'll end with a card I made for an online friend whose creativity inspires me so much!!!

Sunday, October 21, 2012

Still Loving Halloween

I have been having so much fun with Halloween this year.  For my 8 year old grandson, Lance Junior, I made a coffin filled with candy and a surprise skeleton.  The skeleton lies in the bottom of the coffin with Hershey Kisses covering him BUT... when LJ lifts the lid, the kisses go flying and the "hanging" skeleton pops out (hanging from the coffin lid)... such fun.  I found the coffin template on Martha Stewart and the skelton came as part of a skeleton garland from Dollar Tree.  I love it:


Now I am making tootsie pop broom sticks to send along and give out locally.  Will post some photos once I've finished them...

Tuesday, October 16, 2012

I Just Fell in Love

 Yes I have fallen in love...as a kid I loved Halloween and when my kids and grandkids were young I continued to love Halloween but... as I got older and they stopped dressing up, I just kind of fell out of love with Halloween.  However, I just took this incredible class at my local scrapbook store, For Keeps Sake, and I fell in  love with Halloween all over again.  So, of course I have to share what brought back the spark...here it is:

So if you can't figure out what this altered art started as here are some close ups:


Have you figured it out???  YEP...it's a rat trap...LOL...who wouldn't love to alter a rat trap...hahahaha!!!  It was such fun (Thanks for a great time, Nancy!!)  and I absolutely love how each of our traps turned out.   I am especially fond of mine!  LOL  I hope you enjoy my little creation...it is going to be a gift to a dear friend who HATES rats and all rodents.  I thought it would be the perfect little gift.  Well maybe not the last page of the note pad at the bottom.  I just had to provide a little trick with this great big treat, right??? So the very last page has an image of a rat with Boo! stamped on it!  I think she'll scream...now that's my idea of fun!!!  Sick aren't I??!!!  Hope you like it...

Tuesday, October 9, 2012

BUSY, BUSY, BUSY!!!

Don't ya just love deadlines?  They can be such motivators... LOL.  I had 3 cards due by 10/15... remind me not to sign up for 3 swaps due at about the same time ever again... They are all for this great yahoo group I belong to called Stamping Queens.  Lot's of swap choices throughout the month. 

My first card is for the "card of the month" swap, and there was no theme.  I found this cool folding technique on Club Scrap and thought I'd give it a try.  There is definitely a learning curve or maybe it's harder if you're dyslexic...LOL  Here are 2 pics, 1 closed and 1 open...

 
The color is much brighter IRL... but I think its cute.  My next swap is a technique swap, and we were to do the faux patina technique and here is my card for that swap...
 
 
My final card was such fun thinking about and making... We signed up for an image challenge not knowing what the image would be.  I was thinking we would get a copy of a photo or a picture from a magazine or something similar.  Imagine my surprise when what I got were stamped images of bingo cards, bingo pieces, several different words and misc. images...  Here's what I came up with:


I just had so much fun!!  Those are not real dollar bills (but as I think about it, I could have used real ones)  instead I made copies of the front and back of 1 bill and then glued them together and worked them a bit to make them "softer".  I love the idea of shoving them into a container to save enough to go play bingo...I guess that's my lucky bingo card sticking out... LOL  All in all a wonderful couple of days!!!  Now lets see what else I can sign up for... stay tuned.